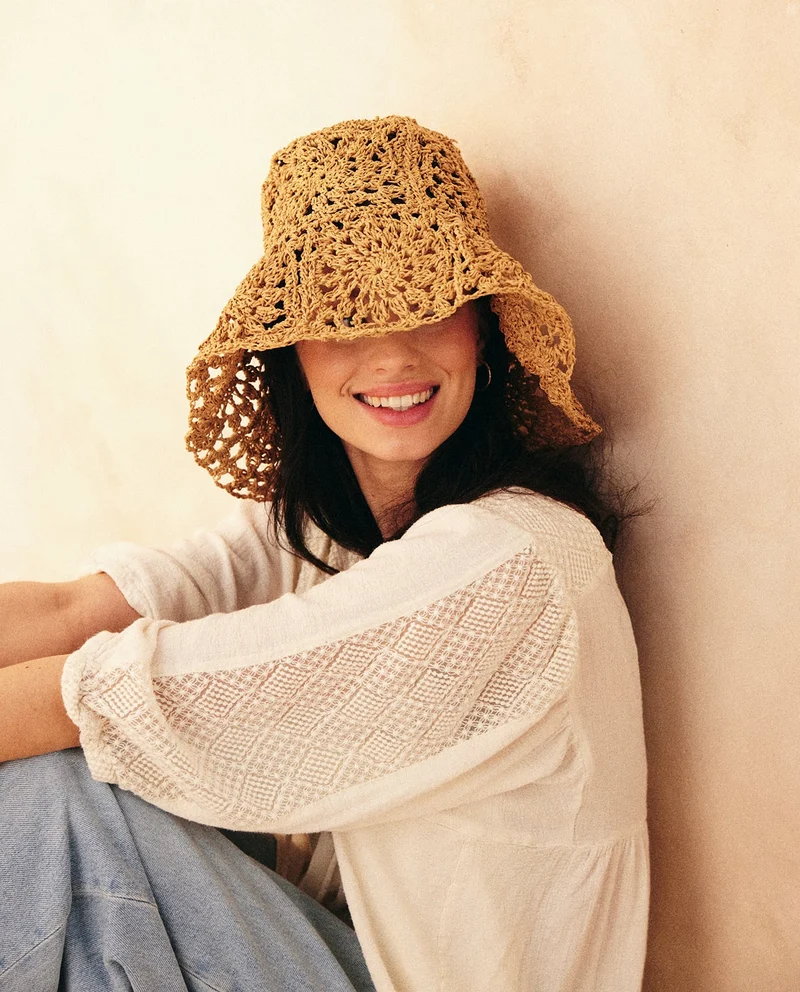
Crocheted raffia hat: easy tutorial for a unique summer accessory
Crochet Raffia Hat: The Complete Guide to Crafting Your Summer Accessory
Summer's approaching, the light dresses are coming out of the closet, and you're missing something. That something is a hat. But not just any hat: a raffia hat crocheted by your own hands, which won't look like any other on the beach. Light, breathable, bohemian just enough, it's the accessory that absolutely completes every summer outfit.
And despite what you might think, it’s not a complicated project. If you know how to do a single crochet and increase stitches, you already have what it takes. We'll explain the rest.
Why Crochet Your Hat Instead of Buying It
A commercial raffia hat costs between €25 and €60 for a standard model. Yours will only cost one skein of raffia (10 to 20 €) and a few hours of work. But beyond the price, it's the personalization that makes all the difference. You choose the width of the brim (small urban brim or generous floppy brim), the colour (classic natural, chic black, summer pastel), and the decorations (ribbon, crocheted flower, beads). Try finding that in a store.
And let’s be honest: there’s real satisfaction in wearing something you made yourself. Especially when your friends ask "where did your hat come from?" and you can reply "I crocheted it".
The Materials
The Yarn. Raffia is the star of this project, but not all raffias are equal. The synthetic raffia (woven paper or viscose raffia) is the easiest to crochet: consistent, strong, it slides well under the hook. The natural raffia is more authentic but trickier: it can break, thickness varies. For a first hat, synthetic is a safe choice. You'll find good raffia yarns at Phildar and Pingouin.
Expect to use a large skein of 200 to 250 g for a complete adult hat (crown + brim). Plan for two if you're unsure about your tension; running out of yarn in the middle of a brim is the kind of surprise you can do without.
The Hook. For standard raffia, a hook of 3.5 to 4.5 mm works well. Raffia requires a slightly larger hook than you'd use for a standard yarn of the same thickness. Choose a hook with a round head, made of metal or bamboo, which glides better through this slightly stiff material.
The Extras. A stitch marker (essential for marking the start of each round), scissors, a yarn needle, a tape measure, and an iron or spray starch for the final shaping. Everything is available in our haberdashery.
Step-by-Step Tutorial
The Crown (Top of the Hat)
It all begins with a magic circle. Make 6 single crochet stitches in the circle, close it, and place your marker.
From here, you will work in continuous spiral (without closing the rounds) regularly increasing so the circle stays flat. The principle: in round 2, make an increase in each stitch (12 stitches). In round 3, one single crochet then an increase, all around (18 stitches). In round 4, two single crochet stitches then an increase (24 stitches). And so on, adding one stitch between each increase with each round.
Continue until you get a disc about 17 to 18 cm in diameter (making about a 54 to 56 cm head circumference once the sides are built). Lay your disc flat regularly: it must remain perfectly flat, without warping or forming a bowl. If it warps, you have too many increases. If it forms a bowl, you need more.
The Sides of the Crown
Once the disc reaches the right size, stop the increases and continue with single crochet, round after round, without adding or subtracting anything. The sides rise naturally and conform to the shape of the head. Count 5 to 7 cm of height for a standard crown. Try the hat as you go (or measure with your tape measure) to adjust.
The Brim
The brim gives the hat its character. You'll resume the increases, but more spaced than for the top, to create a slightly flared disk rather than flat.
For a brim of 6 to 8 cm (classic sun hat style), increase every 5 to 6 stitches per round. For a wide floppy brim of 10 to 12 cm, continue longer at the same rate. Test regularly: the brim should flare naturally without rippling. If waves appear, space the increases further.
Finish with 1 or 2 rounds without increases to stabilize the brim, then close with a slip stitch. Cut the yarn leaving 15 cm, and discreetly weave it in with a needle.
Shaping: The Step That Changes Everything
Crocheted raffia comes out a bit limp and shapeless from the hook. This is normal. Shaping transforms your piece into a real structured hat.
Steam Method. Pass the iron in steam mode over the hat, without directly touching the raffia. Humid heat softens the fibres. Shape the crown on an upside-down bowl or a balloon of the right size, flatten the brim on a flat surface, and let dry completely.
Starch Method. Spray starch over the whole hat, shape it as above, and let it dry for 24 hours. The starch stiffens the raffia and provides perfect hold.
In either case, the hat must dry in position, not flat in a corner. It’s this step that makes the difference between a "homemade" hat and a "handmade" hat.
Personalize Your Hat
A natural raffia hat is already beautiful. But a few touches of personalization make it unique. A fabric ribbon tied around the crown (black for chic, floral for romantic, colourful for fun). A crocheted flower in cotton pinned to the side. Some wooden beads sewn along the brim. Or simply nothing at all, because the beauty of raffia is enough by itself.
And if your hat widens a bit after a few uses (raffia tends to relax), sew a grosgrain ribbon inside the crown. It’s discreet, it adjusts the head circumference, and stabilises the shape for long-term wear.
Frequently asked questions
- Is the crocheted raffia hat suitable for beginners?
Yes, if you have mastered single crochet and regular increases. These are the only two techniques needed. If you're new to crocheting, our article where to start provides the basics. Then, the hat is a very accessible project.
- How long does it take to crochet a raffia hat?
Count 6 to 10 hours for a complete hat (crown + brim), including shaping. Raffia is slightly slower to crochet than regular cotton because it's stiffer. Remember to take breaks: your fingers will thank you.
- How to care for a crocheted raffia hat?
Store it flat or on a form (an upside-down bowl will suffice), never crammed in a bag. If it becomes misshapen, steam it and reshape it. In case of a stain, dab with a barely damp cloth. And above all, avoid water: wet raffia loses its firmness and takes a long time to dry.
- Natural or synthetic raffia for a first hat?
Synthetic, without hesitation. It's more consistent, stronger, smoother under the hook, and forgives tension errors. The result is just as beautiful, and the hat will last longer. You can always try natural fibre for your second or third hat, once you’ve familiarised yourself with the material.